WC Key Manager is the ultimate WooCommerce plugin for effortlessly selling and managing digital products like license keys, gift cards, and software licenses. With features like bulk key generation, import/export, product variation support, and REST API integration, Key Manager simplifies key distribution and management for secure, efficient transactions. Let’s get started on how we can install this plugin on our WordPress website.
Installation and Activation
Installing the free version:
Here are some easy steps to follow for installing the plugins:
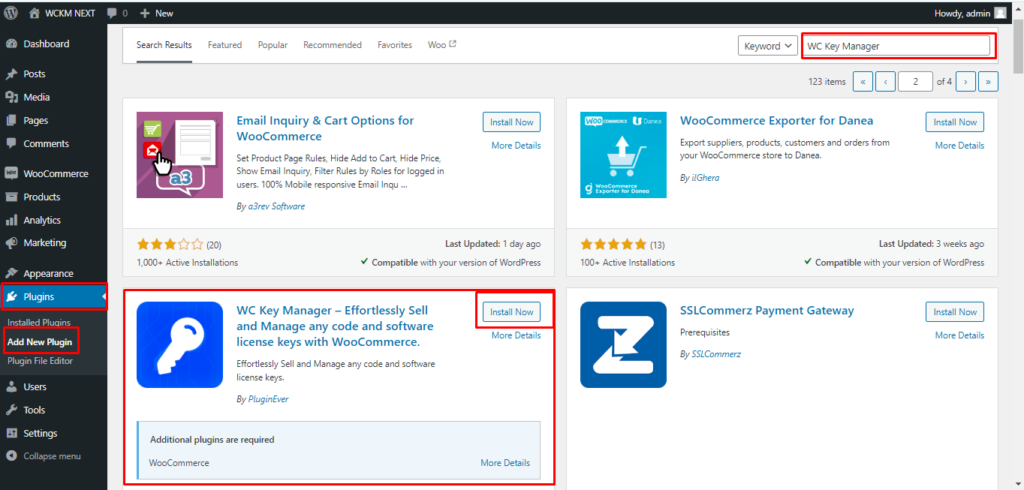
Step 1: First, log in to your WordPress site. Then, go to Plugins > Add New. At the top right, search for “WC Key Manager”. Click on the “Install Now” button.

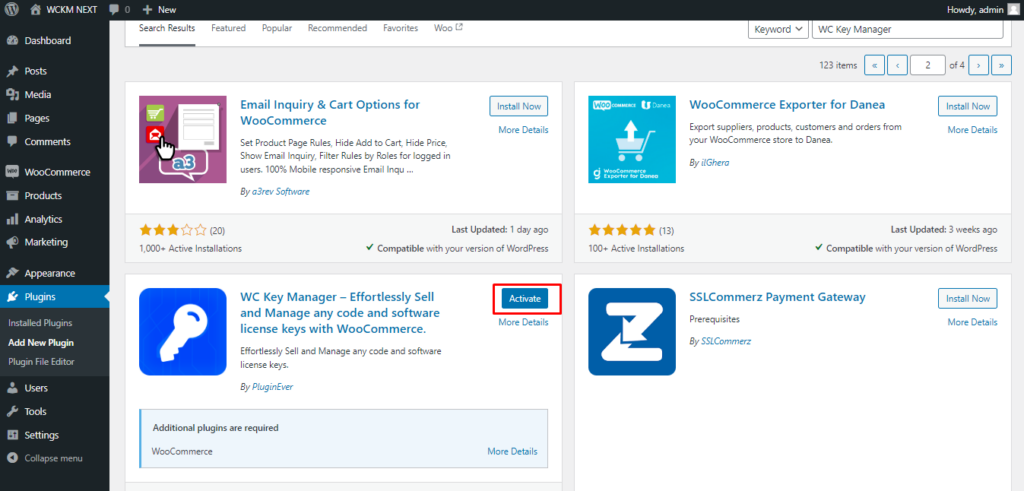
Step 2: After completing the installation, click on the “Activate” button to activate the plugin.

Congratulations! You can successfully install the WC Key Manager on your site.
Installing the Pro version:
Step 1: Download WC Key Manager plugin from the website.
Step 2: Now log in to your WordPress site and go to the admin dashboard. Navigate to Plugins > Add New.
Step 3: Click on the “Upload Plugin” button at the top of the page. Choose the WC Key Manager zip file you downloaded from your computer by clicking the “Choose File” button.
Step 4: After selecting the file, start the installation process by clicking the “Install Now” button.

Step 5: After completing the installation, click Activate Plugin to activate the plugin.

That’s it you successfully install the pro version of WC Key Manager.