
If you’re a vendor using Dokan Lite and want to sell digital products like license keys, activation codes, or serial numbers, the WC Key Manager plugin makes it easy! This guide will walk you through how to add a product key directly from your vendor dashboard.
Prerequisites: What You Need Before You Start
To use this feature, make sure the following settings are properly configured:
1. Install and Activate Dokan Lite
- Go to Plugins > Add New in your WordPress admin panel.
- Search for “Dokan Lite” and click Install and Activate.
2. Enable Multi-Vendor Support in WC Key Manager
- Go to your WordPress Admin Dashboard.
- Navigate to Key Manager > Settings > Advanced.
- Scroll down to the Multivendor Support section.
- Check the box to Enable Vendor Key Management.
- Save settings.
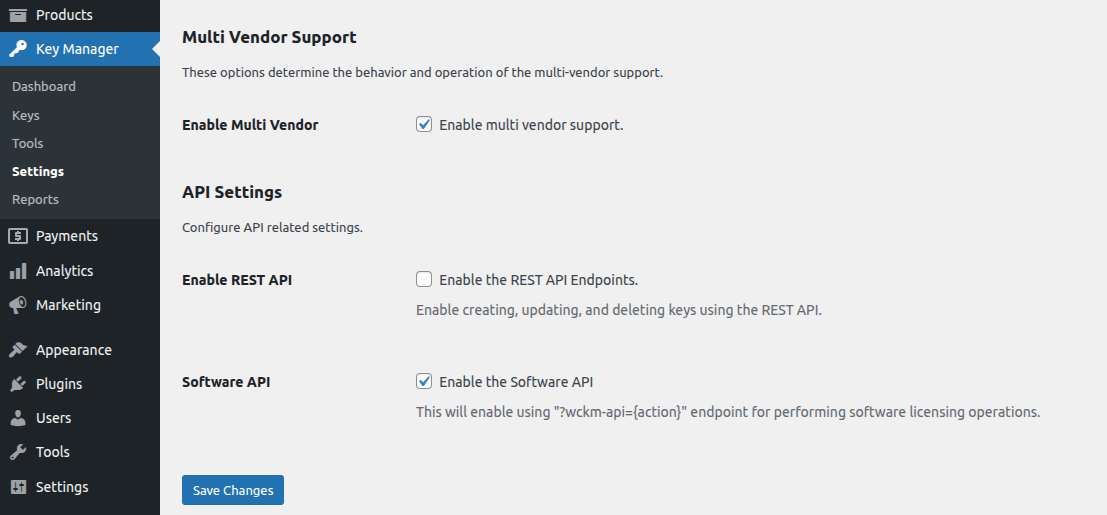
Note: Only the site admin can enable multivendor support. This must be done before vendors can access the “Key” menu in their dashboards.
This guide will walk you through how to add a product key directly from your vendor dashboard.
Step 1: Log In to Your Vendor Dashboard
- Go to your website’s login page.
- Log in using your vendor account credentials.
- You’ll be redirected to your Dokan Vendor Dashboard.
Step 2: Go to the “Key” Menu
- From the left sidebar, find and click on the “Key” menu.
- This is where you can view all your existing keys and add new ones.
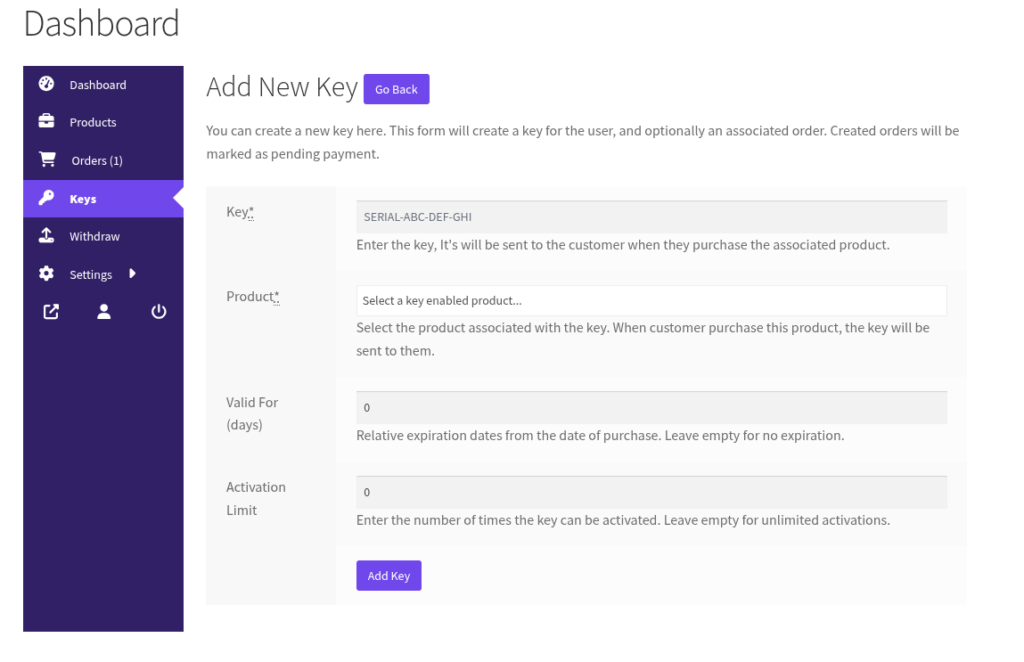
Step 3: Add Key
- Click the “Add Key” button.
- A form will appear where you need to enter the following details:
Fields to Fill Out:
| Field | Description |
|---|---|
| Key* | Example: SERIAL-ABC-DEF-GHIThis is the license key that will be automatically sent to the customer after purchase. |
| Product* | Select a product that you have already created that supports license keys. When a customer purchases this product, the selected key will be delivered to them. |
| Valid For (days) | (Optional) Enter the number of days the key will remain valid after purchase. Leave it empty or type 0 in no expiration. |
| Activation Limit | (Optional) Set how many times the customer can activate this key. Leave it empty or type 0 for unlimited activations. |
Fields marked with * are required.
Step 4: Save the Key
After filling out the form, click the “Add Key” button to save it.
Your key is now stored and will be automatically delivered to the buyer when they purchase the selected product.
Manage Your Keys
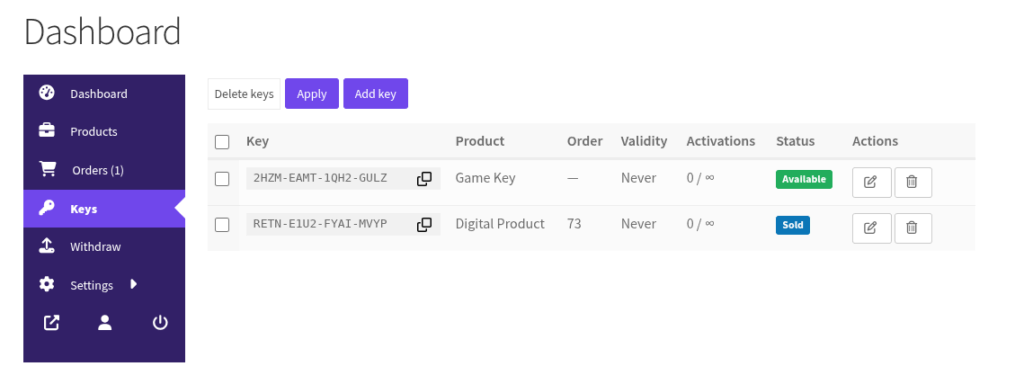
Back on the Key menu page, you can:
- All your available and sold keys.
- Delete any unsold keys by clicking the delete icon.
This helps you keep track of which keys are used, pending, or still available.
Tips for Vendors
- Make sure your product is already created before assigning a key.
- Only key-enabled products will show up in the dropdown list.
- For bulk key management, ask the site admin if there’s a CSV import feature available.